Basic Angular Website
Doug Richards, Dotric Pty Ltd, October 2024.Contents
Introduction
For some years now I have been involved in the development of Angular coded websites. While Angular development seems to require a large number of source files, the underlying structure has a consistency that is readily understood. However, the Angular projects I have been working on in the corporate world typically include an ASP backend which connects to a database. These days Microsoft Visual Studio offers a ready made Angular ASP template that gets a new project off to a good start.However, what about a very basic website with no remote server connection that simply describes a product range with contact details? How is this achieved with Angular and a simple text editor as the development tool? In the process of performing this exercise I learnt a few things about Angular. What follows is a description of this journey. I assume that the reader is familar with html and css files but perhaps not so familar with Angular.
Starting A New Project
If you haven't created an Angular project before then, of course, you need to install Angular. To do this you start by installing Node.js. Once Node.js is installed, open up a Command Prompt window as administrator and enter the following command:- C:\Windows\System32>npm install -g @angular/cli
- C:\Websites>ng new my-website
Now it is a case of changing to the newly created website folder and running the newly created website by typing the following command:
- C:\Websites\my-website>ng serve --open
- A node_modules folder which contains large numbers of library files.
- A public folder which is a good place to put resources such as image files. You will note that it already contains the favicon.ico icon file which is displayed next to the browser tab page label. You may care to replace this with an icon that is more to your liking!
- A src folder that contains your source files.
- A number of json configuration files that become relevant when things go wrong.
- <app-root></app-root>
- @Component({
- selector: 'app-root',
- standalone: true,
- imports: [RouterOutlet],
- templateUrl: './app.component.html',
- styleUrl: './app.component.css'
- })
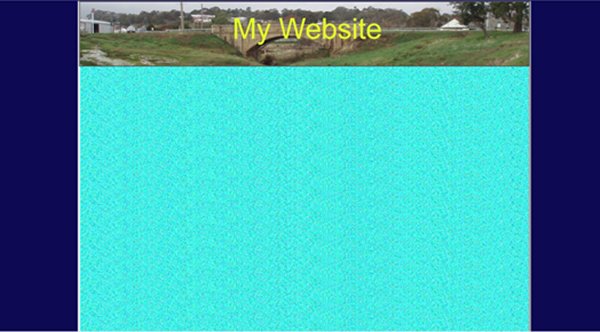
I have modified app.component.html and app.component.css to produce the following:

Primary Navigation
For this website I will provide tab pages with side bar menus on each tab page. There will also be a home page that summaries the website contents. To start off we will add the material library. This library provides a number of very handy UI elements. To add the material library, in the Command Prompt window in the root folder for the project, type the following command:- C:\Websites\my-website>ng add @angular/material
While we are at the command prompt, the home page and the tab pages can be added with the following commands:
- C:\Websites\my-website>ng g c home
- C:\Websites\my-website>ng g c tab-page-1
- C:\Websites\my-website>ng g c tab-page-2
To connect up the new components, open up app.routes.ts in src/app and add the following import commands to the existing list:
- import { HomeComponent } from './home/home.component';
- import { TabPage1Component} from './tab-page-1/tab-page-1.component';
- import { TabPage2Component } from './tab-page-2/tab-page-2.component';
- export const routes: Routes = [
- {path: '', redirectTo: '/home', pathMatch: 'full'},
- {path: 'home', component: HomeComponent },
- {path: 'tabPage1', component: TabPage1Component },
- {path: 'tabPage2', component: TabPage2Component }
- ];
- import { Router, RouterModule, RouterOutlet } from '@angular/router';
- import { MatToolbarModule} from '@angular/material/toolbar';
- import { MatTabsModule } from '@angular/material/tabs';
- import { CommonModule} from '@angular/common';
- imports: [RouterModule, RouterOutlet,MatToolbarModule,MatTabsModule,CommonModule],
Then add a constructor to the AppComponent class as follows:
- navLinks: any[];
- constructor(private router: Router) {
- this.navLinks = [
- {
- label: 'Home',
- link: 'home',
- index:0
- }, {
- label: 'Tab Page 1',
- link: 'tabPage1',
- index:1
- }, {
- label: 'Tab Page 2',
- link: 'tabPage2',
- index:2
- }
- ];
- }
- <nav mat-tab-nav-bar [tabPanel]="tabPanel" style="position:absolute;top:142px">
- <a mat-tab-link
- *ngFor="let link of navLinks"
- [routerLink]="link.link"
- routerLinkActive #rla="routerLinkActive"
- [active]="rla.isActive">
- {{link.label}}
- </a>
- </nav>
- <mat-tab-nav-panel #tabPanel style="position:absolute;top:200px">
- <router-outlet></router-outlet>
- </mat-tab-nav-panel>
- C:\Websites\my-website>ng serve --open
Home Page
I have modified home.component.html and home.component.css in the src/app/home folder to produce the following:

- <div class="box" (click)="onTabPage1()" >
- import { Router } from '@angular/router';
- constructor(private router: Router) {}
- public onTabPage1() {
- this.router.navigate(['tabPage1']);
- }
- public onTabPage2() {
- this.router.navigate(['tabPage2']);
- }
Secondary Navigation
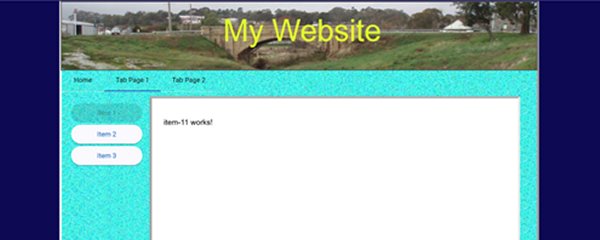
To add side bar menu items to tab-page-1, start by creating the new items. To do this open the Command Prompt window, change to the root folder for the project and type the following commands:- C:\Websites\my-website>ng g c tab-page-1/item-11
- C:\Websites\my-website>ng g c tab-page-1/item-12
- C:\Websites\my-website>ng g c tab-page-1/item-13
- import { Item11Component } from './tab-page-1/item-11/item-11.component';
- import { Item12Component } from './tab-page-1/item-12/item-12.component';
- import { Item13Component } from './tab-page-1/item-13/item-13.component';
- export const routes: Routes = [
- {path: '', redirectTo: '/home', pathMatch: 'full'},
- {path: 'home', component: HomeComponent },
- {path: 'tabPage1', component: TabPage1Component,
- children:
- [
- {path: 'Item1', component: Item11Component, outlet: 'tabPage1'},
- {path: 'Item2', component: Item12Component, outlet: 'tabPage1'},
- {path: 'Item3', component: Item13Component, outlet: 'tabPage1'}
- ]},
- {path: 'tabPage2', component: TabPage2Component }
- ];
Now proceed to tab-page-1.component.ts to set up the menu items for tabPage1. Start by adding the following import declarations:
- import { MatSidenavModule } from '@angular/material/sidenav';
- import { MatButtonModule } from '@angular/material/button';
- import { Router, RouterOutlet, RouterModule } from '@angular/router';
- import { CommonModule} from '@angular/common';
- imports: [MatSidenavModule,MatButtonModule, RouterOutlet, RouterModule, CommonModule],
- navLinks: any[];
- constructor(private router: Router) {
- this.navLinks = [
- {
- label: 'Item 1',
- link: ['/tabPage1', {outlets: {tabPage1:'Item1'}}],
- index:0
- }, {
- label: 'Item 2',
- link: ['/tabPage1', {outlets: {tabPage1:'Item2'}}],
- index:1
- }, {
- label: 'Item 3',
- link: ['/tabPage1', {outlets: {tabPage1:'Item3'}}],
- index:2
- }
- ];
- this.router.navigate(['/tabPage1', {outlets: {tabPage1:'Item1'}}]);
- }
- <mat-sidenav-container style="margin-left:20px;margin-top:10px;background-color:transparent">
- <mat-sidenav-content style="height:200px; width:150px">
- <button mat-tab-link
- *ngFor="let link of navLinks"
- style="width:100%;height:40px;margin-top:5px"
- mat-button mat-raised-button
- [routerLink]="link.link"
- routerLinkActive #rla="routerLinkActive"
- [disabled]= "rla.isActive">
- {{link.label}}
- </button>
- </mat-sidenav-content>
- </mat-sidenav-container>
- <router-outlet name="tabPage1"></router-outlet>
Finally I have added a Document style element to styles.css to be used in every menu item within a tab page to provide menu items with a consistent location and appearance.

Deployment
To perform a release build, open the Command Prompt window, change to the root folder for the project and type the following command:- C:\Websites\my-website>ng build
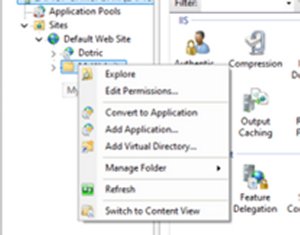
Once Internet Informstion Services (IIS) is installed, create a new suitably named folder for your website within the C:\inetpub\wwwroot folder. Now copy the contents of the afore mentioned dist/my-website/browser folder into the newly created folder under inetpub\wwwroot.
At this stage open index.html and replace the following line:
- <base href="/">
- <base href=".">

- http://localhost/MyWebsite